
I’ve moved in to the cottage!
…and here I sit, among the barrage of boxes…
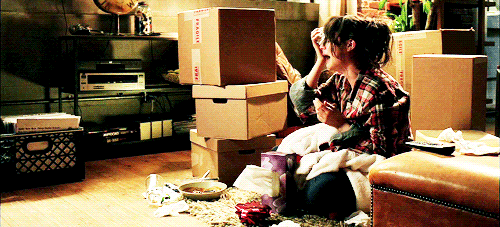
Seriously, this hasn’t been the smoothest move of my life, but that’s usually the case when DOWNSIZING is involved! I DO like “my stuff”……
(interesting side note….it’s not unusual for clients to come to me, planning to downsize….but I’d estimate that 90% of the time, they reject EVERY house we see that would fulfill those wishes….people (including yours truly) do NOT like to go backwards in most things in life, including square footage, storage & stuff!)

So, for the last 3 weeks our wonderful crew has been in a race to the finish, pending my moving day! They all worked so hard to get the messiest, ickiest, and stinkiest jobs handled before I had to spend the night here……and by stinkiest, I mean the oil-based paint we had to use on all the woodwork!
By way of explanation for those not ‘in the know’, the world of paint finishes is now blessed to have perfectly good water-based (latex or acrylic) finishes for wood; however, if one is painting OVER existing woodwork that was originally painted with oil-based paint, one must use oil-based paint again. (and many of us old-timers swear it’s a superior finish anyway) WHAT IF YOU DON’T?? Well, I can speak from first-house experience on that subject: back in the 80’s my young and energetic self painstakingly painted the kitchen cabinets in our first home a lovely white; since I had little children, I was concerned about the fumes (off-gassing) from oil -based paint, so I used the new latex enamel! Oh, I was so proud of myself…. until the paint started peeling off in sheets a few months later.
So here’s the rule: you can paint over water-based paint with oil-based paint, but NEVER the reverse! You might say that ” oil trumps water” when it comes to paint.
OK, one more woodwork detail, then I’ll show you some pictures….I’m aware that’s why you’re still here! When we started this fixer upper, my wonderful carpenter/builder extraordinaire, Jose Chavarrio, quietly made the decision to save and reuse all of the original workwork, to the extent that was possible. Since we were doing such extensive work, that meant he had to REMOVE most of the base and facings (the crown had been sprayed along with the ceiling when some earlier remodeler decided that popcorn ceilings would be nice !) So he removed and stored trim….and later removed all the old nails in the trim. And when the day came to finally trim out the newly-remodeled rooms, he re-installled the old woodwork in all the main rooms, leaving new woodwork for the entirely new master bedroom only. What a heroic effort that was…..and the payoff is that most of my little cottage has original woodwork, recoated with fresh oil-based paint! (OK, just ONE MORE detail; for those inquiring minds in the crowd, we DID NOT remove the previously-popcorned crown mouldings….we simply installed a larger crown over them!)
So…disclaimers first! None of the pictures you’re about to see are true “after” pics! I am still solidly stuck in the unpacking phase. But little by little, the beauty of this cottage is being revealed, and I know many of you are eager to SEE! So that’s why I’m calling these “Sneak Peeks!” Just know you’ll see more completely finished-out rooms soon!

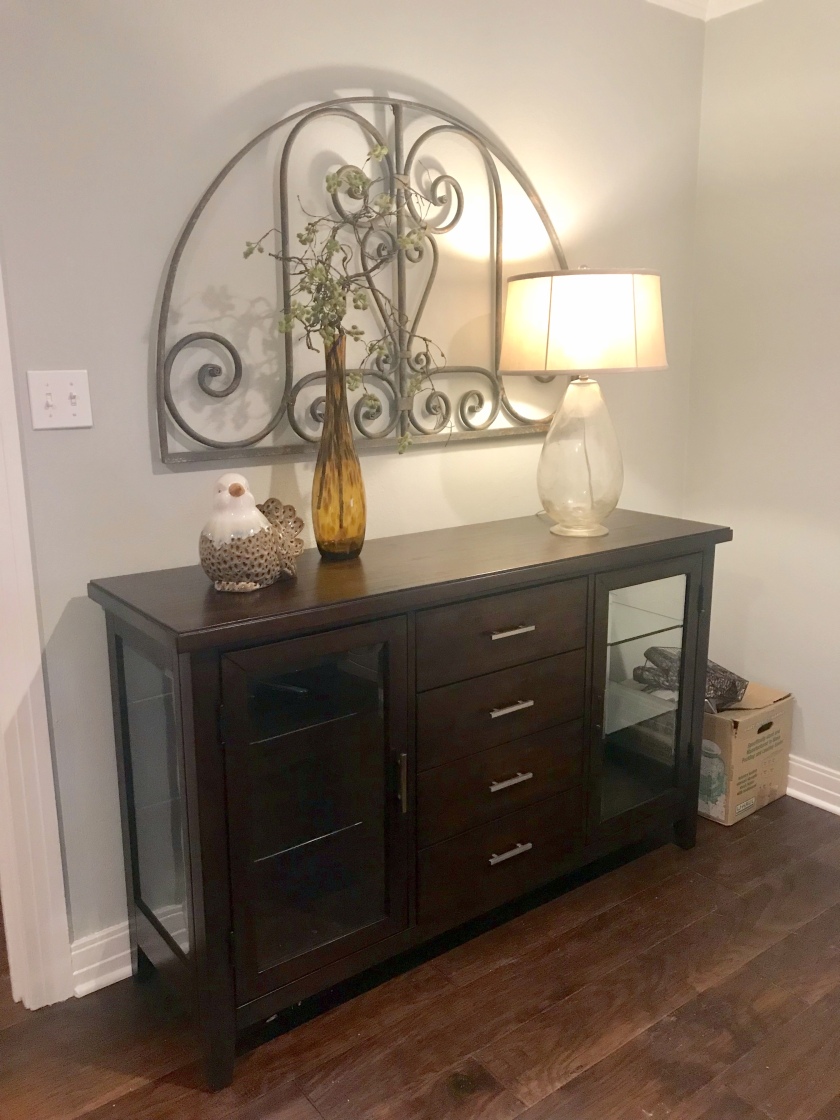
Many of you saw this on Facebook….it was night, I was too tired to unpack another box….and I just couldn’t resist! Behind those counter stools is a MOUNTAIN of UHaul and Home Depot boxes!
-
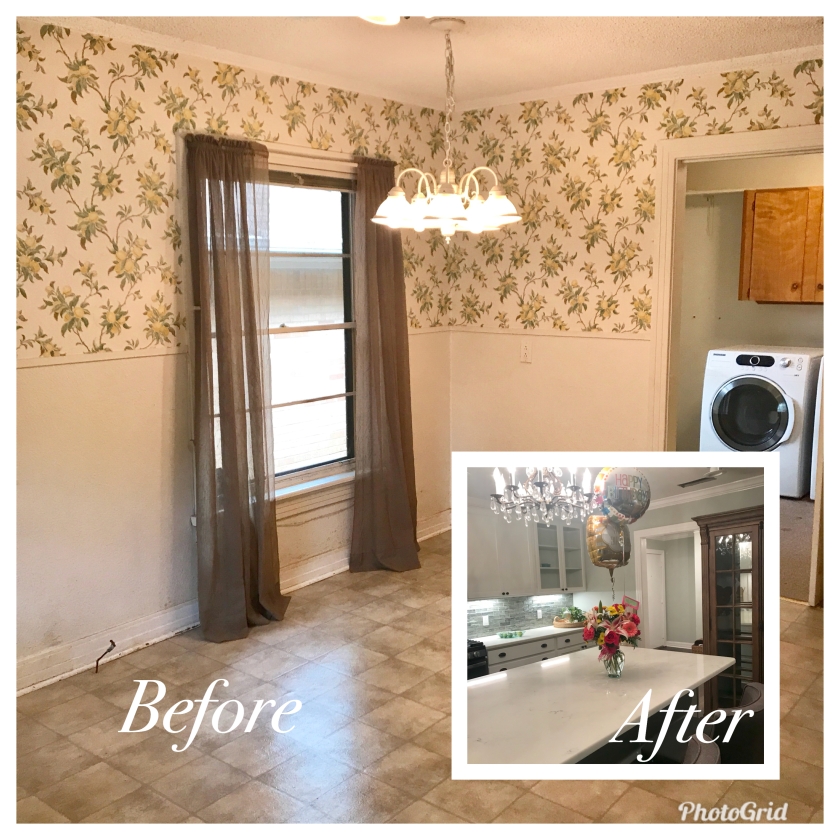
As a reminder, the chandelier was originally in the living room
-
What’s missing? The swinging old-door-from-Canton (had to move in the washer/dryer first)
-
I had just FINALLY removed the plastic covering from the quartz countertops for the first time minutes before…this lovely 7′ island had been a handy horizontal surface for tools, caulk, sandpaper, stray mouldings, etc….for weeks!
-
The flowers? YES, I DID move on my 60th birthday! Thanks, my friend!
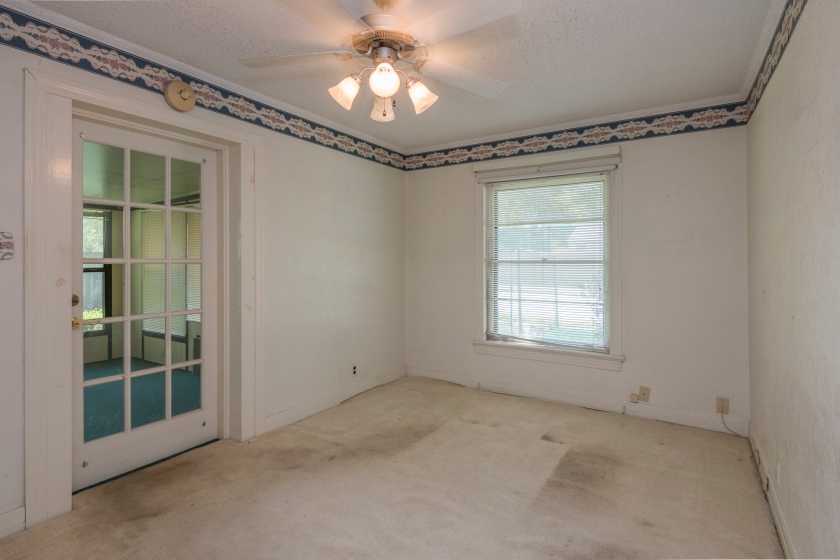
And just a quick reminder of where this view started…
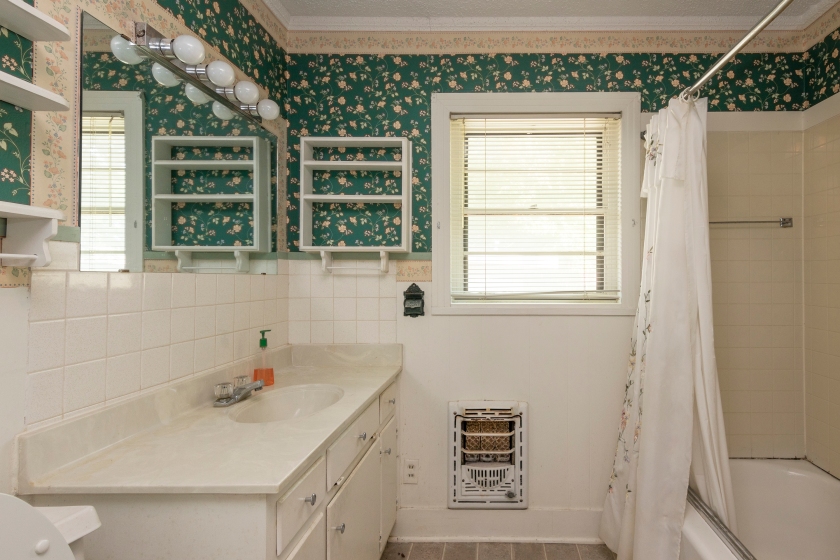
Here’s a current view of the hall bath…
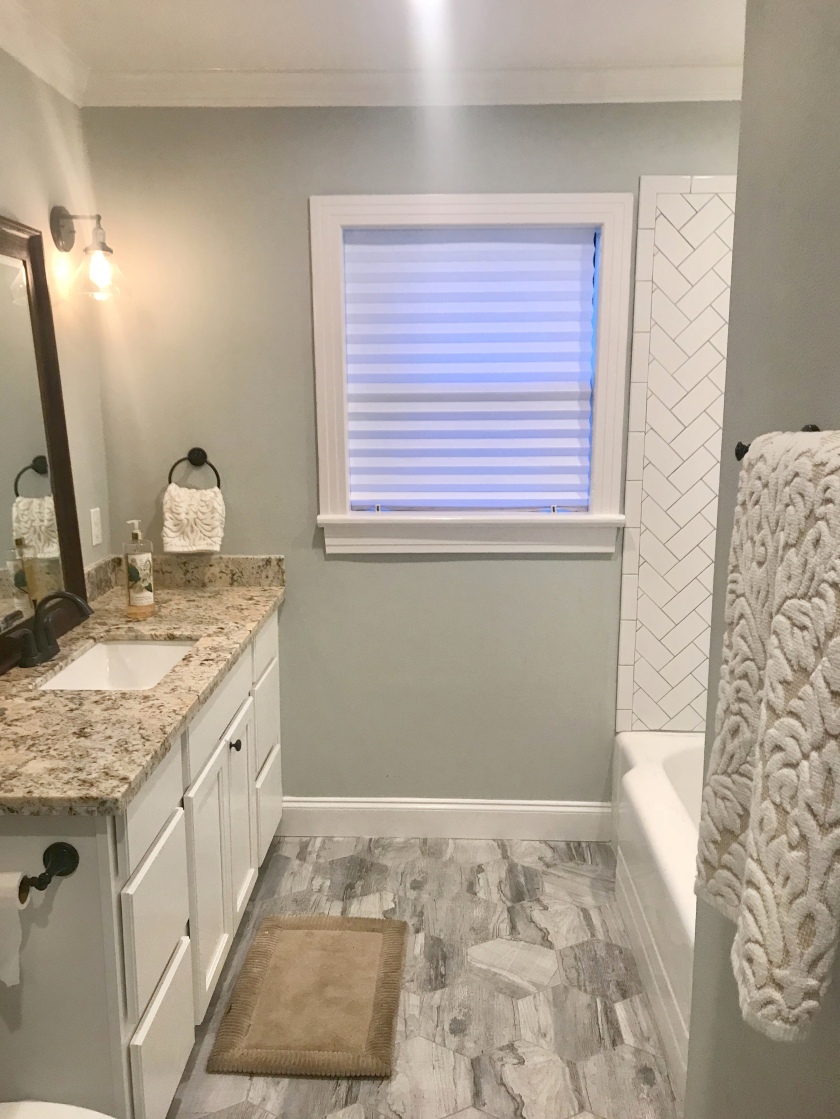
And a reminder of what we started with…
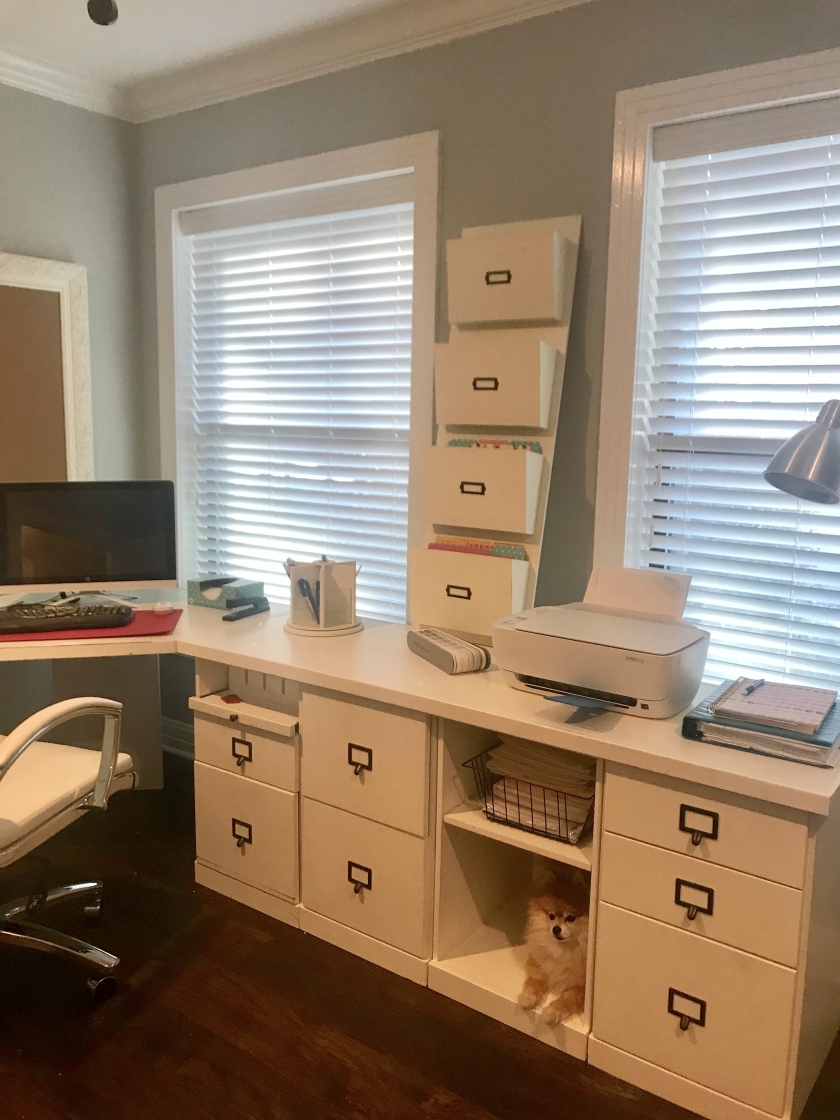
I’m loving my new home office! And look! I haven’t even had time to mess up the desk yet!
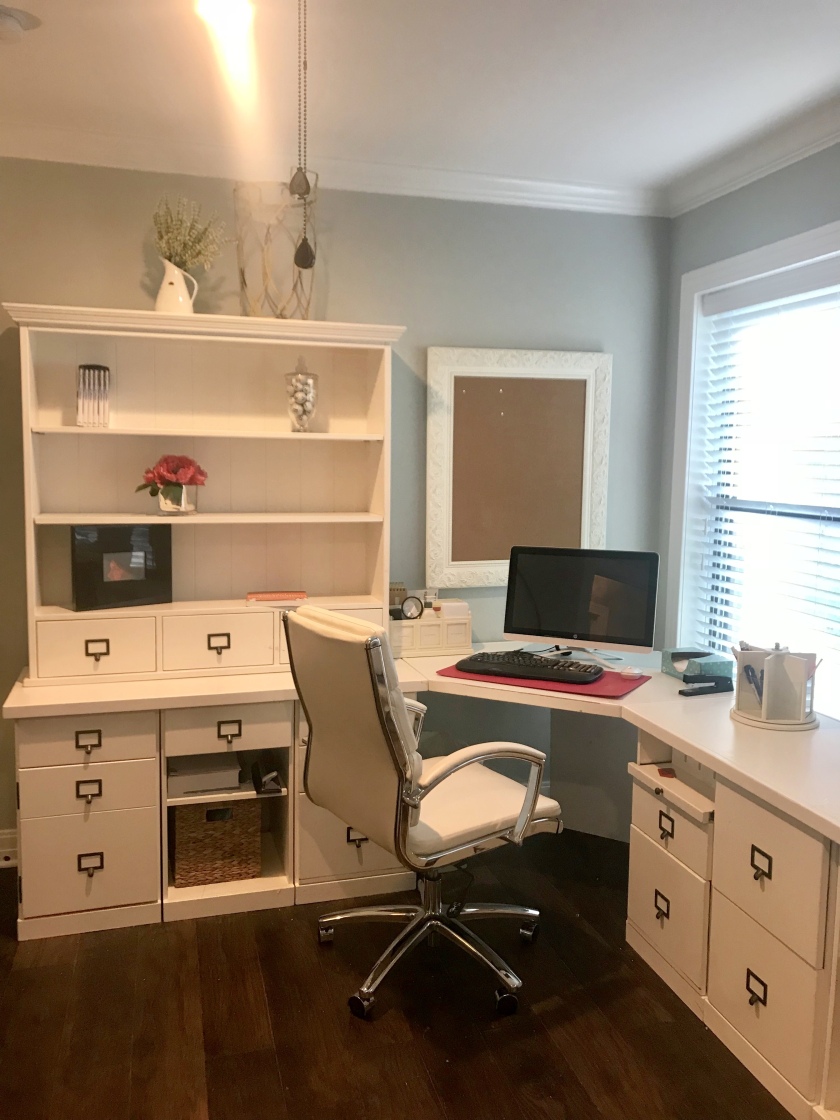
(Something tells me Ballard Designs didn’t have a dog bed in mind for that particular cabinet, but Kobe claimed it long ago; he keeps watch while I work!)
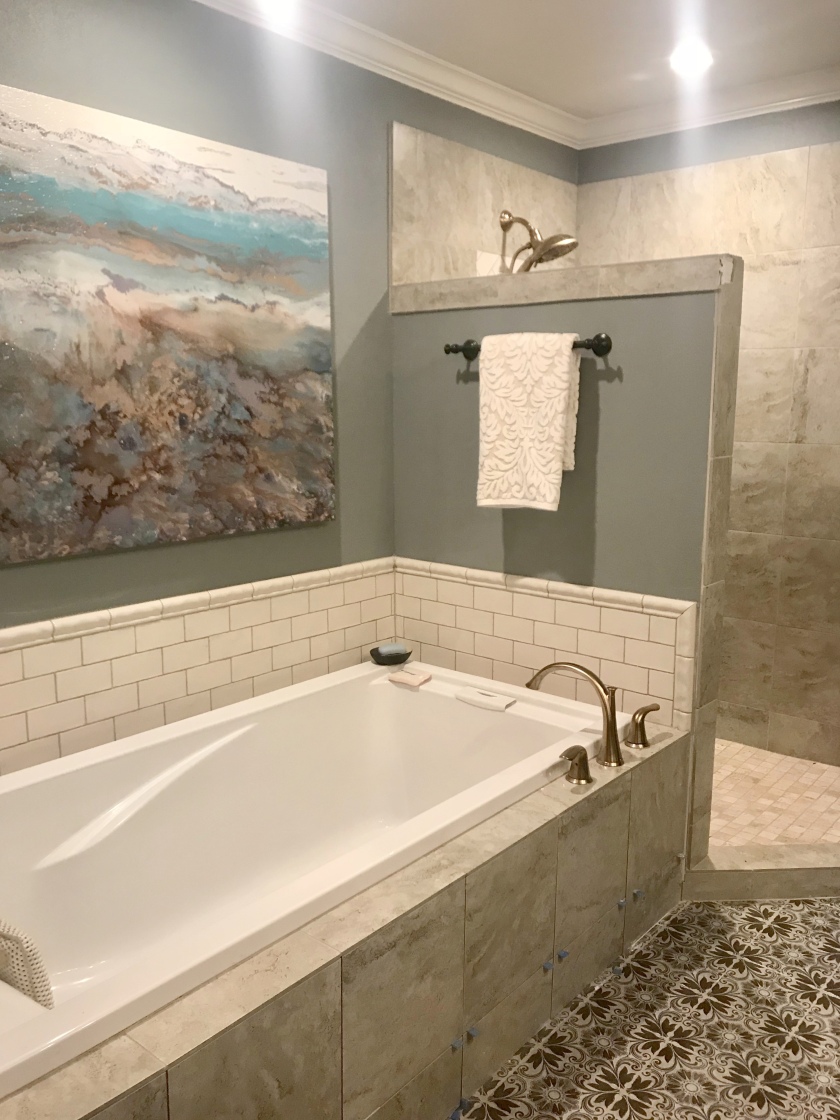
A few scenes from the new Master Bath….


And once again, a reminder from whence it came:
-
The window was removed; the walk-in shower is now in that corner
-
The door was moved to the left a few feet; the tub-to-die-for now sits there
-
Everything….EVERYTHING else about this room….changed!
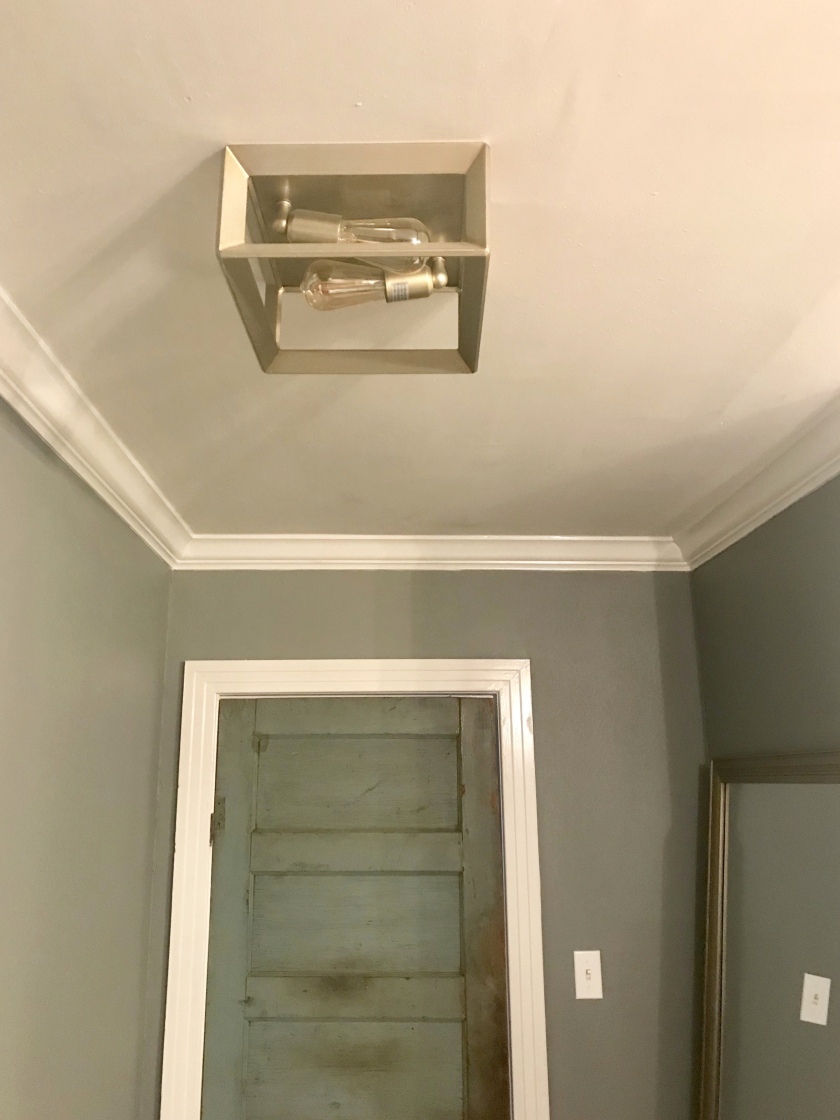
Now I want to share a detail that is hard to illustrate (due to the difficulty of photographing a light fixture while it’s ON!)
This hall light fixture is original to the house; we changed nothing about it, unless you want to count using LED bulbs so I never ever have to bother changing them:


When you look down the hall from the living room towards the master bedroom….


….you see a consistency of light…but it’s not until you enter the master bath that you see why…..I LOVE this new fixture mirroring the old!
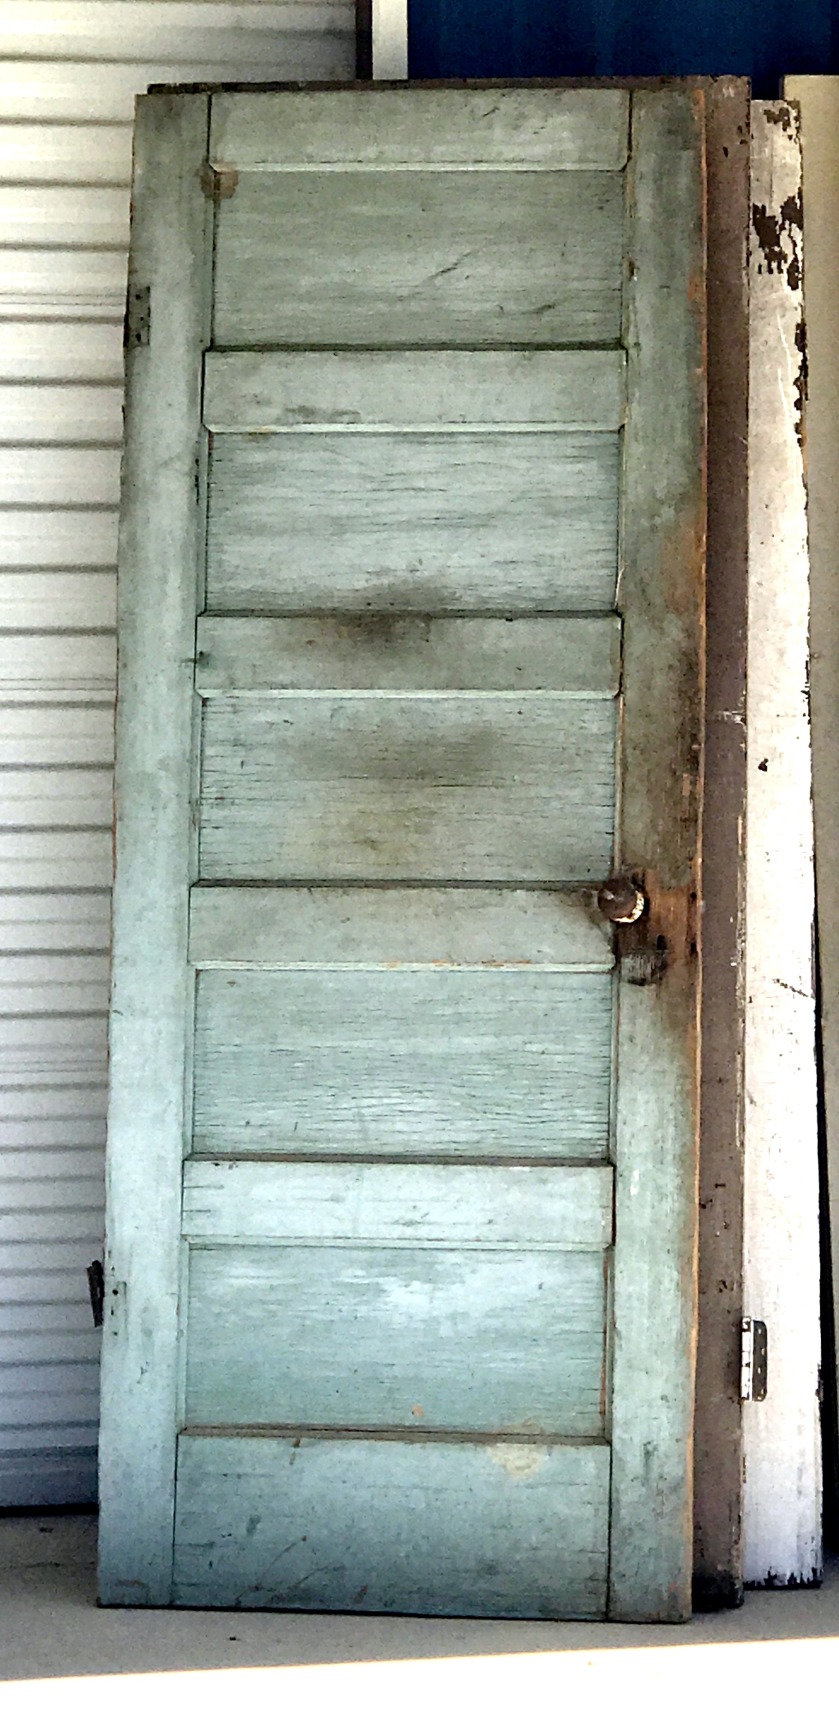
OK, so…about that old blue door I love so so much….first, would you even believe me if I told you that I bought the interior paint WEEKS before I finally found “the door” to use between the master bath and bedroom?! It’s true! (I can hardly wait to show you the bedroom side of this door, and another synchronicity of design that was totally unplanned!)
So, here is the door in the form it came to us:
I would be embarrassed to say how much I pored and pondered over what to actually DO to clean and preserve this, as well as the 2 other old doors I bought for the house. My goal was to clean off the dirt, but preserve as much as possible of the peely-paint, patina, and patchiness of the old doors. After all, if I destroyed the character, what would be the point of using them in the first place? But most treatments would, indeed, destroy what I loved about these re-purposed beauties. Entirely true to my personality, I came up with the solution literally the night before the day I HAD to do something to the doors. (if any of my old teachers were reading this, they’d be seriously rolling their eyes right now; I have ALWAYS tackled important projects just prior to the deadline! )
Harsh detergents would wash off the paint; a wire brush or sandpaper would remove the crazing and certainly any about-to-peel patches; sandpaper would leave fine particles in the ridges created by old joints and slight peels; any ‘clear coat’ would yellow or buckle, and shine too much (even if matte finish).
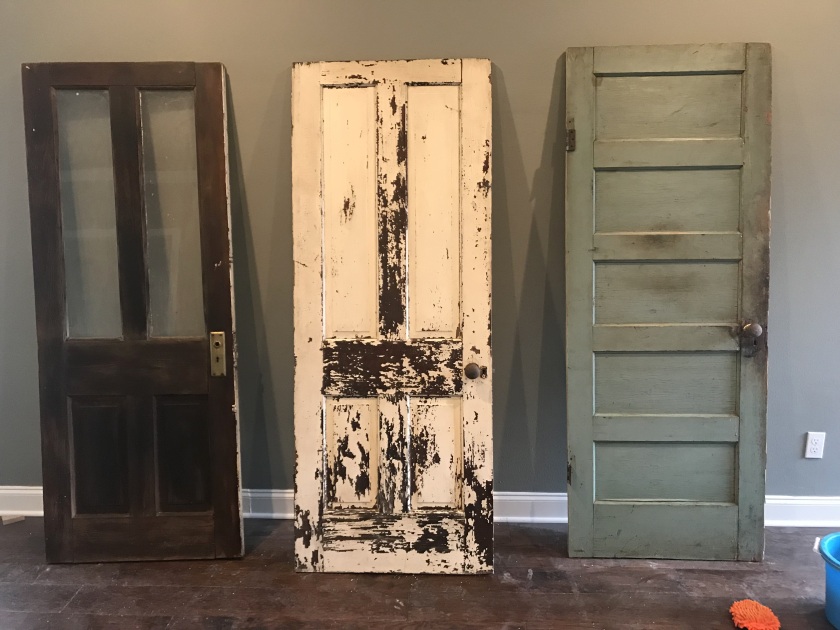 So here are the 3 doors AFTER treatment (wish I’d thought to photograph the reverse sides too!) And here is what I did:
I brushed down each door, both sides, with a lint-free soft mop-like hand brush (think feather duster with fat dust-resistant soft fabric loops) That removed loose dust.
Then I gently washed each with a soft sponge and a solution of mild dish detergent in a bucket of water. I was super-pleased with how much dirt I was able to remove without harming the finishes!)
Next I used a soft white cloth to rub in a mixture of orange oil and beeswax; it was painstaking work, as I had to be sure every inch of each door was “nourished” with the mixture. The oil soaked into the dry, thirsty wood, then the soft beeswax sealed in the moisture. The difference was subtle, but certainly noticeable! There is a natural sheen now that the wood is nourished.
Now, the door in the middle is a little different. There is obviously much more peeling paint on this one; given the age, it is likely to be lead-based paint chipping off. I don’t have little ones toddling around, eager to eat cute little paint chips….but nonetheless I don’t want that door regularly ‘raining chips’. I removed all that were loose, but since this will be the sliding door on my pantry, it’s going to be moved daily. I am therefore going to spray a coat of clear matte sealer on this door. I was so opposed to this, but having faced the fact that more chips are inevitable, I have decided it’s the best coarse of action. To remind you, Jose is going to slice this door vertically, and hang ‘barn door’ style as pantry doors. That should happen this week, and I’ll spray the finish afterwards.
That brings me to the status of the project, which you may be wondering about: we are all weary of the work and in need of a break in the action! And now that I live here, I’m not crazy about having guys show up in the morning and throughout the day to “fix” something. So all but Jose are off to other projects for now; he is staying with me this week to finish up details on the inside, such as hanging the barn doors, hanging curtain rods, installing new door hardware & keying the locks alike, finishing up the shelves for the living room built-ins, and building the 2′ “box” for the base of the black bathroom cabinet. There are many little details he and I will handle this week…..then Jose, too, will move on to other projects for awhile.
It is now too cool and damp to paint the exterior brick and siding; this is so disappointing, as I’m eager to have it sporting it’s new white finish! But we really need a consistent week of warm, dry weather, and it’s just not predictably going to happen for awhile. So, we will regroup and attack the exterior of the house in February or March, including landscaping. The new garage door should be arriving any time now, so we’ll get that done, but otherwise we’re all ready for a renovation rest!
I’ll be back with more blog posts, though, as the interior gets photo-ready! There are so many details, how-to’s and hints I’d like to share with you, so keep watching for posts! In the meantime, please leave comments letting me know what type of posts/info/pictures you enjoy the most: I aim to please!
Now, as we all turn our thoughts to family, friends, food & fellowship, I want to thank each of you for sharing in my fixer upper journey; many of you have touched my life in ways you do not know….I wish for you all the happiness you can stand in the coming holidays & afterwards into 2018!

please don’t forget to leave me your comments below…and remember…….I’m never too busy to help your real estate referrals; I will treat each with the highest level of service!

Well done! I think the master bath is my favorite, followed by your office with the built-in yapper dog. Very nice design and craftsmanship. Congratulations!
LikeLiked by 1 person
Thank you Don; the master bedroom and living room are pretty special too! They’re just not fit for even minimal pictures just yet!
LikeLike
I absolutely love all of it! I always want to know paint colors please. HGTV magazine has spoiled me. I need to paint my hallways (well, everything) soon to cover years of sliding hands along the corners as you go down the hall.
LikeLike
Thanks Carla! The house is only two colors (on the walls). Sherwin Williams Silver Strand in most rooms, and Illusive Green in the master bed and bath. And the woodwork is all SW Pure White (which isn’t really “pure white” btw!). I can’t think of the ceiling color right now, but I’ll let you know! It looks white, but has a warm undertone to reflect nicely on faces!
LikeLike
Wow, I am so impressed.
LikeLike
Karen…how is your fixer upper coming? I think pics may be in order!
LikeLike
I’ve enjoyed reading about your new journey. It has been very inspiring and I love all the photos. You have made great progress and it is beautiful.
LikeLike
Debra, thank you!
LikeLike
As a fellow bath tub soaker, I love your Master Bath- the artwork is an absolute perfect touch. It is all simply beautiful! I bet you just sit among the boxes and smile- a job well planned and executed!
LikeLiked by 1 person
Diana, you would LOVE this tub! Thank you!
LikeLike
Love the master bath, especially the floor tile.
Glad to see you are doing what you love. It’s all gorgeous!!!
Have a great holiday.
LikeLike
Thanks Jamie! It has been too much fun, problems and all!
LikeLike
Love it! Can’t wait to see it in person!
LikeLike